Paul A. Romsky Jr. - Fluke Multimeters

1970's Fluke 8050A Multimeter with Rechargable Batteries - Low Cost Fuse Replacement

Fluke model 8050A Multimeters that have the rechargable batteries option requires a Slow Blow 1/32A (31.25mA) 250V 8AG (1/4 inch by 1 inch glass) fuse. These fuses are not very common and can be quite expensive (tens of US dollars). However, Slow Blow 32mA in 5mm x 20mm 250V Glass Fuses are available and cost less, at about 3 dollars each. The following photos show how I retro fitted a blown original 8AG style fuse to adapt to a lower cost comparable 5mm x 20mm fuse.

***************
* WARNING *
***************
These are not instructions, they are just a chronical of what I did. I assume no liability for death, injury, or property damage resulting from any part of this publishing. DO NOT attempt this modification - it is for information use only.

1. I lightly filed the top edge of each contact end of the blown 8AG fuse so that solder/flux will stick to the metal contacts.
2. I soldered small pieces of brass (tabs) to the 8AG contacts. These act as inward extenders to mount (solder) the two 5mm fuse clips to accept the 20mm long fuse.
3. Using a 5mm x 20mm fuse as a spacing guide (snapped into the clips), I solderd the clips to the tabs. A bit difficult to do but possible.
4. The blown 8AG fuse fits in the existing Fluke 8050A main power fuse holder, with the smaller fuse clips "piggbacking" on top.
5. The lower cost Slow Blow 32mA 250V 5mm x 20mm Fuse simply snaps in on top of the original fuse.

I used as little heat as possible as to not crack the glass tube.
The metal end cap contacts seprated from the glass tube during soldering. I let the entrie assembly (metal and glass) cool naturally - I DID NOT blow, or apply any liquid to the fuse while it was hot, it would have cracked the glass tube. After it all had cooled to ambient temperature, I use cyanacrylic glue (super glue) to glue the end caps back onto the glass tube. I worked quickly to insure the caps were fully inserted onto each end of the tube before the glue set.

When done, I pulled on each clip and end cap to be sure they were securely attached and could not be pulled off. I then insertred and removed the "piggybacked" fuse a few times after the assembly was installed in the Multimeter. The modification MUST be secure and verified as sometimes solder joints may look sound but are actually mechanically weak. Failue to do this can cause an electrical shock or fire hazzard.

 
Parts List:
Manufacturer Supplier Price (USD) ----------------------------- ------------------------------------ ------------- Item Name Part Number Name Part Number Qty U/M Unit Total Description ---- ------------ ---------------- --------------- -------------------- --- --- ------ ------ ----------------------------------------------------------------------- 1 Bussmann MDL1-16 Fluke 163030 1 EA Fuse, Original, Blown, 8AG, 1/32A (31.25mA) 250V, 0.25 x 1.0 Inch 2 Eaton BK1/S506-32-R Digikey 283-BK1/S506-32-R-ND 1 EA $2.77 $2.77 Fuse, Slow Blow, 32mA 250V, 5mm Diameter, 20mm Length, Glass 3 Keystone 3561 Digikey 36-3561-ND 2 EA $0.31 $0.62 Clip, Fuse Holder, Cartidge, 5mm, 10A 4 Quick Chip RASWLF.031 1OZ Digikey RASWLF.0311OZ-ND 50 MM $0.007 $0.35 Solder, Sn96.5Ag3Cu0.5 (96.5/3/0.5%), 21 AWG, Rosin Activated (RA), off of a $7.06 1 oz Roll 5 K&S 8230 Ace Hardware 5024583 5 MM $0.006 $0.03 Metal, Strip, Brass, 0.016 Inch Thick, 0.25 Inches Wide, 12 Inches long, off of a $1.79 piece of Stock ------ Grand Total $3.77 Unit of Measure (U/M): EA Each MM Millimeter Notes: Any rosin core flux solder would have worked. I only needed about a 2 inch length of solder/flux. Item 4 is shown for my reference. I only needed a small piece of "solderable" metal as shown in the photos. Item 5 is shown for my reference.


1
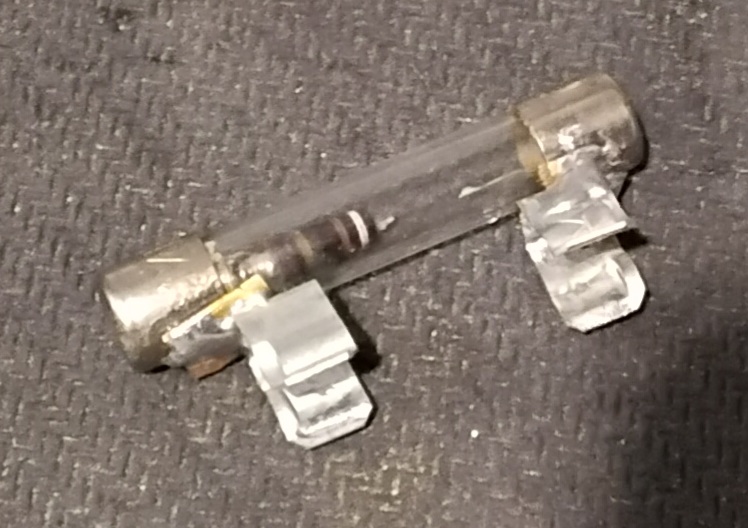
Soldered brass tabs and fuse clips to blown fuse


1
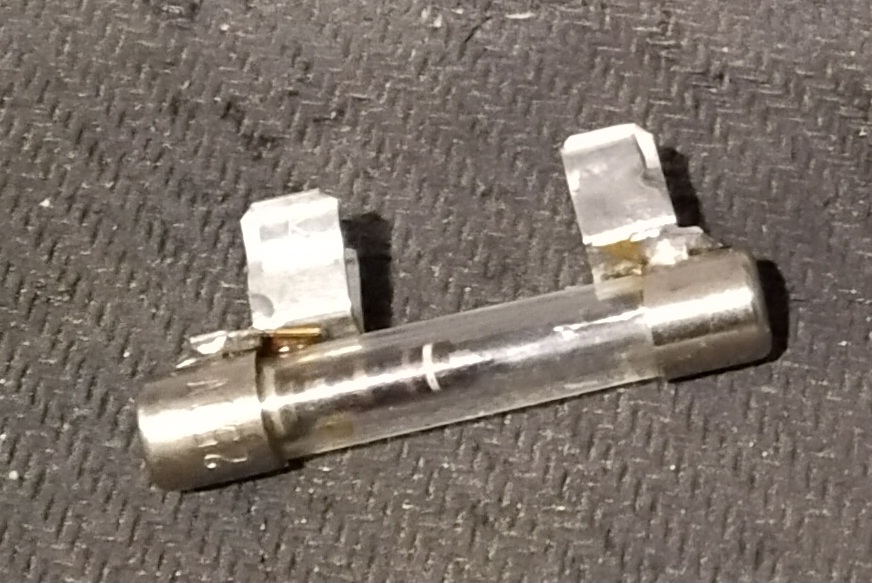
Other side of blown fuse


1
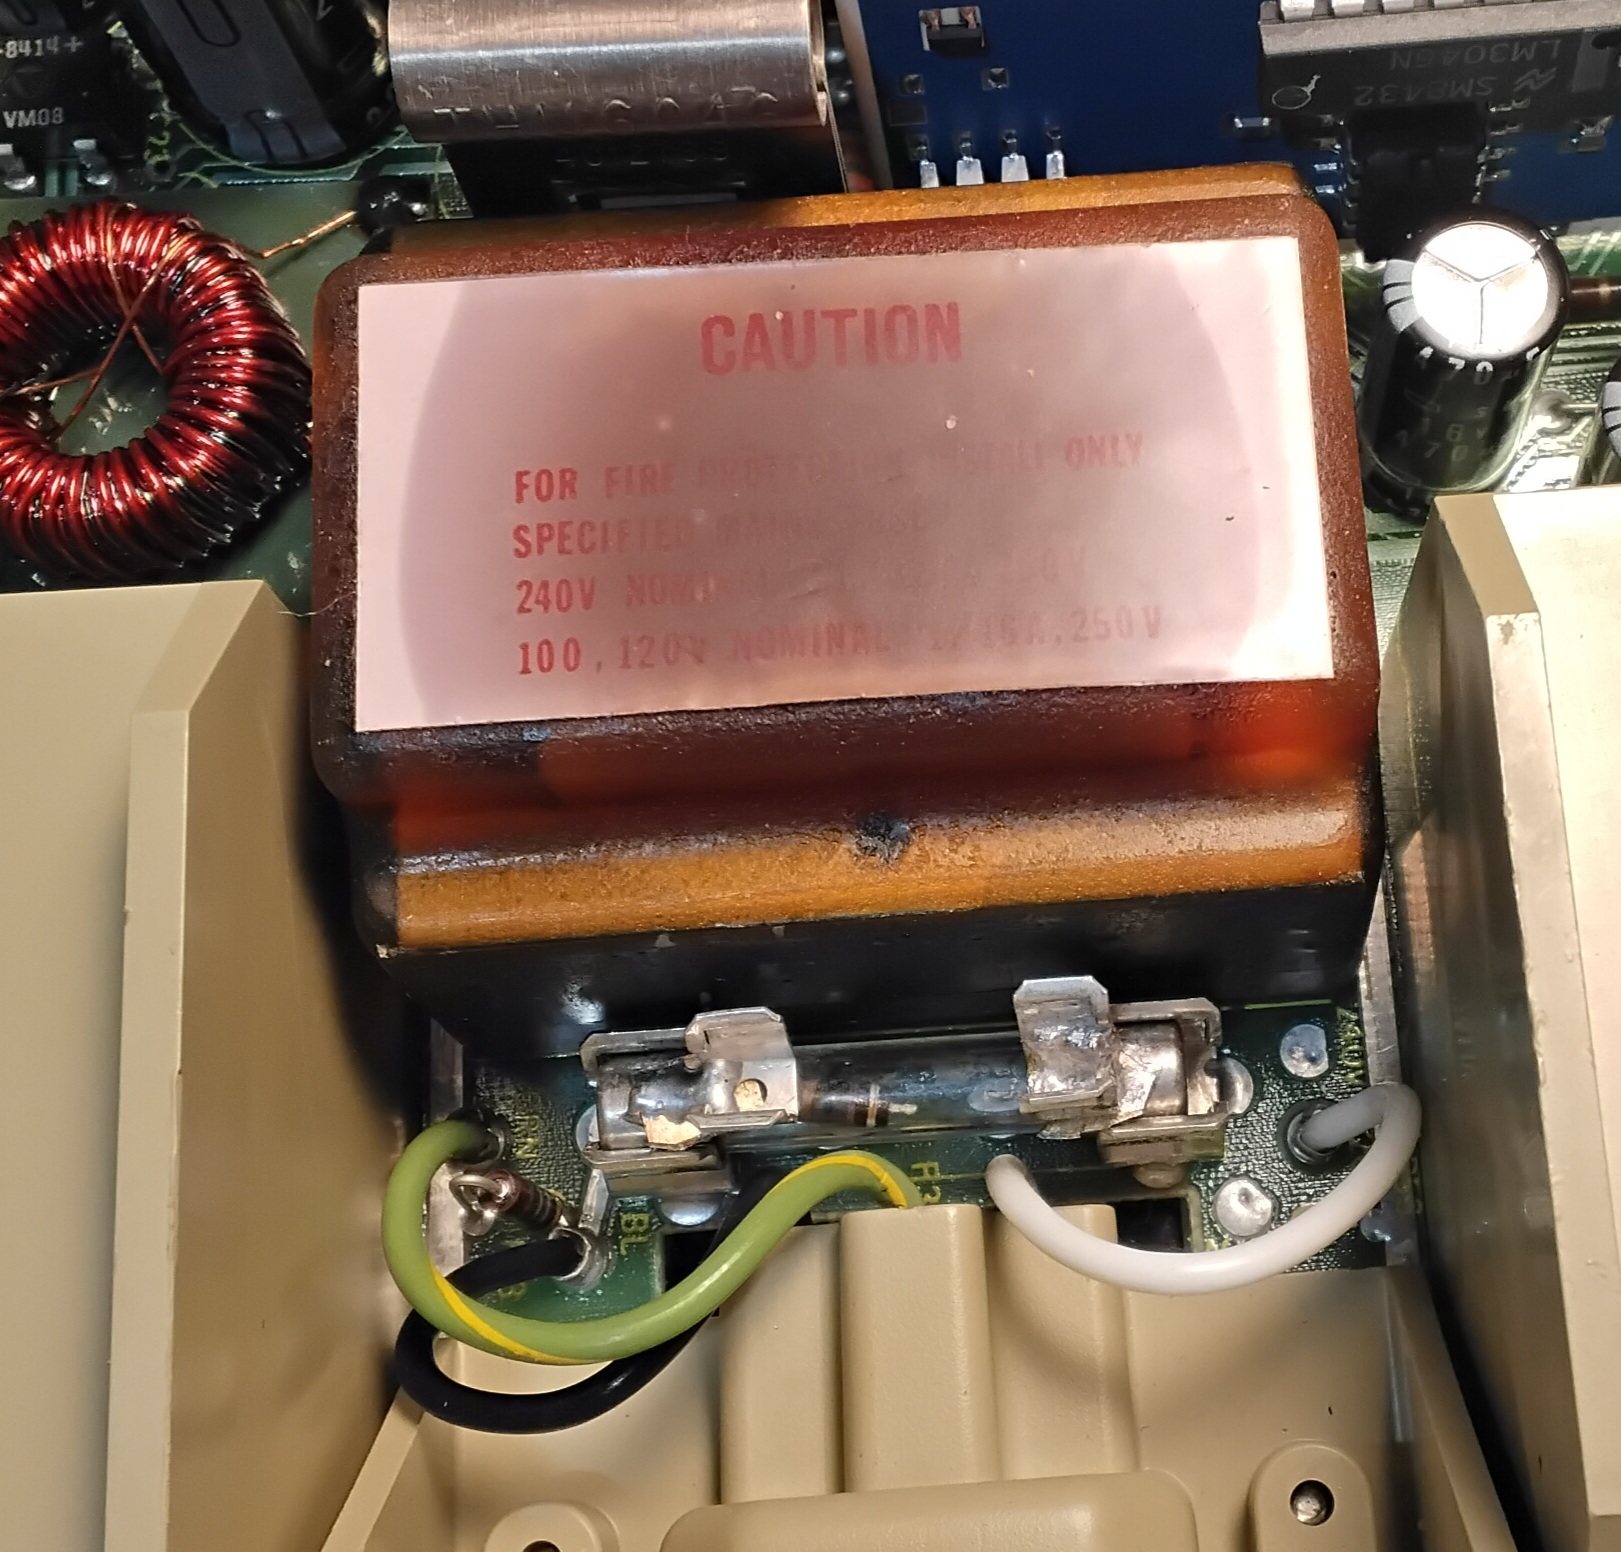
Modified blown fuse inserted in the the Fluke 8050A. Ready for a new 32mA fuse


1
Low cost Slow Blow 32mA 250V 5mm x 20mm fuse installed


Home